Browse Month August 2023

Rebuilding the Patio Canopy: Integrating Modern Techniques & Materials, Part 2

The journey of rebuilding my patio canopy was no different. This section delves into the process of how I seamlessly integrated a sturdy 6×6 post through the existing roof eave and employed 3D printing technology for a custom solution.

1. Integrating the 6×6 Post:

Stability is paramount when you’re working on a structure like a patio canopy. By choosing to work with a 6×6 post, I was not only looking at durability but also an aesthetic that commands attention.

Steps to Integration:

  • Measurement: First, I ensured that the location of the post was precisely where I wanted it, keeping in mind the balance and the overall design of the canopy.
  • Cutting through the Eave: Cutting through an existing structure requires a steady hand and the right tools. I used a reciprocating saw to create a neat opening just wide enough for the post.
  • Placement: The 6×6 post was then vertically aligned and set into its predetermined position.

2. Custom 3D Printed Flashing:
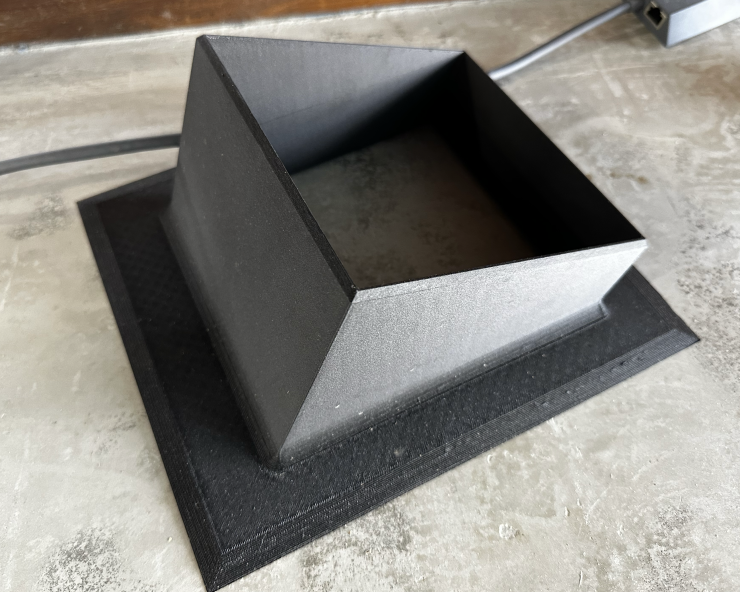
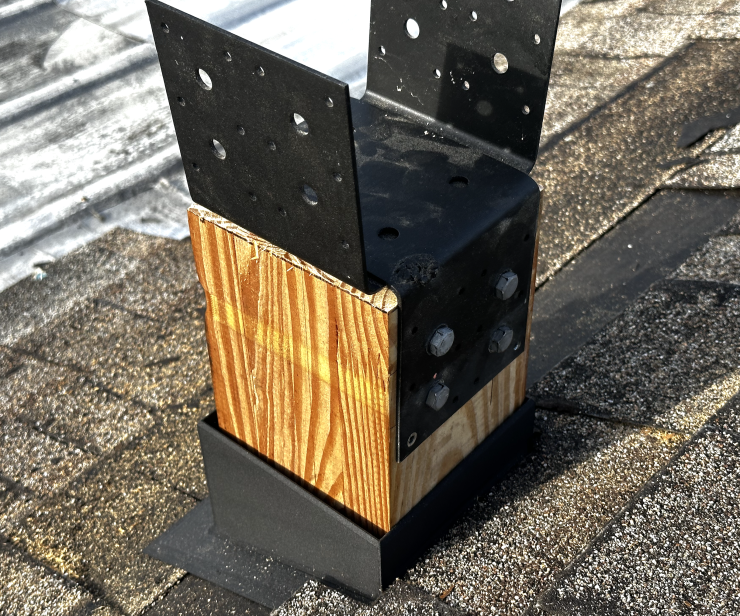
Here’s where tradition meets technology. To ensure a watertight seal around the post and the roof eave, a flashing is vital. Instead of settling for an off-the-shelf solution, I took the modern route.

Steps for Flashing:

  • Designing: Using CAD software, I designed a flashing tailored to fit snugly around the 6×6 post, ensuring compatibility with the roof eave’s shape and dimensions.
  • Material Choice: Carbon Fiber filament was chosen for its strength and weather-resistant properties. This ensured that the flashing would last a long time without deteriorating.
  • 3D Printing: Once the design was ready, I sent it to my 3D printer. A few hours later, a custom flashing, perfect for my needs, was ready.

3. Connecting the Post and Beam:

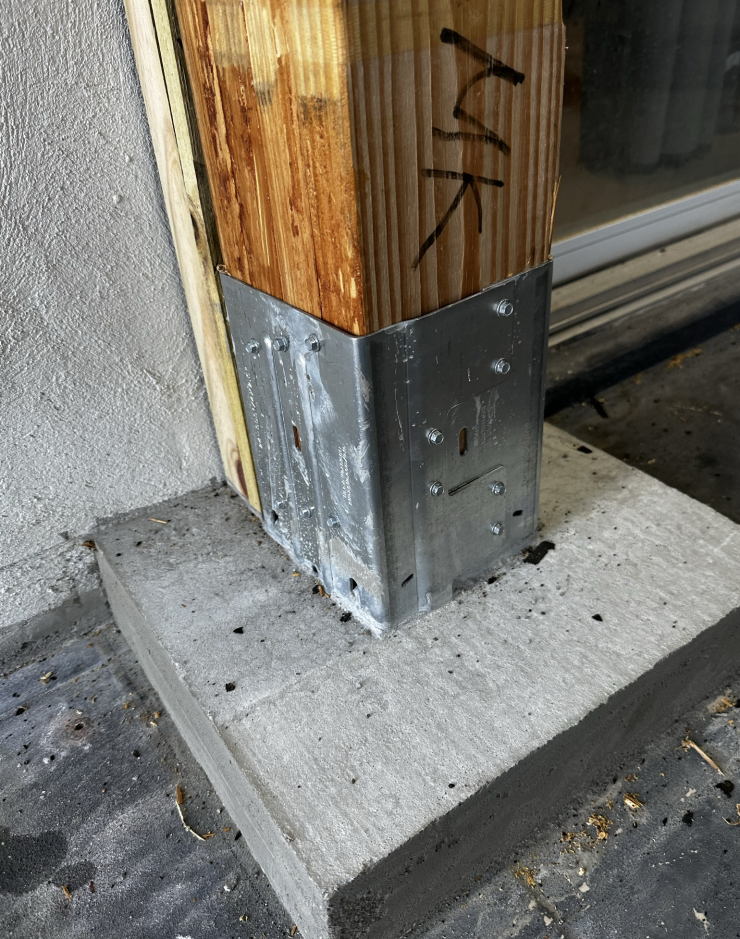
Connecting the post and beam securely is crucial for the structural integrity of the canopy. This is where the U-brackets come into play.

Steps for Connection:

  • U-Brackets: I used two interlinked U-brackets, chosen for their strength and reliability.
  • Alignment: After marking the correct heights on both the post and the beam, the U-brackets were positioned.
  • Through Bolting: Once aligned, I drilled holes for through bolts, ensuring they were of the right diameter. With corrosion-resistant bolts, washers, and nuts, the post and beam were tightly connected.

The marriage of traditional woodworking and modern technology like 3D printing has added a unique touch to the canopy project. Not only does the structure stand tall with reinforced strength, but the custom elements, like the 3D printed flashing, add a personal touch. The canopy is not just a shelter; it’s a testament to innovation and creativity in home improvement.
Read more

Rebuilding the Patio Canopy: Enhancing Underside, Lighting, and AirflowCanopy Rebuild, Part 1

Revamping a space often brings not just an aesthetic appeal but also functional enhancements. If you have a patio canopy, which has seen better days, it’s high time you think of giving it a new lease on life. I recently undertook such a project and wish to share my experience and tips on how to upgrade the patio canopy. I focussed on improving three core areas: the underside, lighting, and airflow.

1. Renewing the Underside:

The underside of a canopy can make or break the overall look. With exposure to the elements, this part can age rapidly, making the entire structure look dated.

Steps to Renew:

  • Choose your Material: Fresh wood is an excellent choice for the underside due to its natural and inviting appearance. Cedar or redwood are both resistant to rot and pests, making them suitable for outdoor settings.
  • Preparation: Before attaching the new wood, make sure to remove the old material completely. Clean the framework and check for any structural weaknesses.
  • Installation: Lay the wooden panels or planks horizontally or vertically based on your design preference. Remember to leave slight gaps between them for better airflow. Secure the wood using corrosion-resistant screws.

2. Illuminating with Elegance:

Adding lights can drastically change the ambiance of your patio. It makes the space usable even after sunset and adds a cozy feel to your outdoor haven.

Steps for Lighting:

  • Decide on Lighting Type: LED strip lights can be attached to the underside for a continuous glow. Pendant lights or fairy lights can be draped for a more whimsical appearance.
  • Wiring: If you’re not skilled with electrical tasks, consider hiring a professional. Ensure all wiring is waterproofed and safely hidden.
  • Switch Control: Consider adding a dimmer switch. This allows you to control the brightness, setting the mood for any occasion.

3. Enhancing Airflow:

A well-ventilated canopy ensures that you stay comfortable, especially during warm days.

Steps for Improved Airflow:

  • Strategic Gaps: As mentioned, leaving gaps between the wooden planks or panels can enhance airflow. However, make sure they’re not too wide to compromise shade.
  • Adding Fans: Installing outdoor ceiling fans can make a world of difference. Choose a fan that’s rated for outdoor use. Position it centrally for even distribution.
  • Climbing Plants: Consider training some climbing plants around the canopy’s edges. While this won’t directly improve airflow, it provides a natural cooling effect.

Rebuilding the patio canopy is more than just a facelift. By focusing on the underside, lighting, and airflow, you’re upgrading both the form and function of your outdoor space. With these enhancements, your patio is set to be your favorite retreat for relaxation and entertainment.

Read more